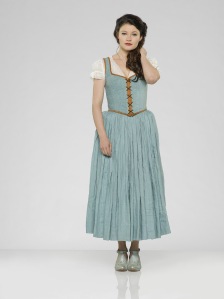
So I love the show Once Upon a Time and decided I needed a cosplay from it. My favorite characters at the moment are Belle and Hooke. Since a lot of people have told me I look like the actress for Belle I figured “Why not?”. I actually finished this costume over a month ago but I have been horrible at updating my walk-through blog. I will try to be more on top of it this year as I complete costumes.
Lets Dive right on in!
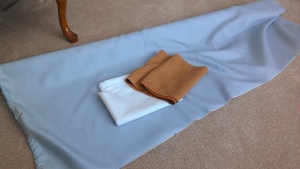
So beginning with materials. I found an amazing cotton satin in the upholstery section of Joanns that matched the texture and color incredibly well. They do not sell it anymore unfortunately though I used a basic shirt linen for the blouse, a simple white lining, and costume suede for the bias tape. (all found at Joanns) I used Butterick 6196 for the corset. I altered the corset to add darts, reduce the strap size, add a square neckline, and added more grommet holes. So I basically destroyed the original pattern. I drafted my own pattern for the skirt since it was a simple gathered box skirt and waist band. If you use the same pattern it wont come out at all like mine just so you know. Here is the unholy mock up that took me forever to get the darts the way I wanted them:

After that was completed, it was time to cut out the real fabric and linings. (The satin is just lined with a medium weight interfacing)
The inside lining is made a layer muslin and the basic lining from Joanns. I followed the recommended boning places from the pattern besides the front panels. I moved it closer to the ends to reinforce the grommets.
This step does not have pictures but I hemmed some of the seams with a serger and fray checked some other parts to stop the fraying during the sewing process. Then I assembled everything together with a new technique I learned for this project called sewing in the ditch. I basically pinned the lining and satin sides together with bad sides facing in. I lined up the seams and then sewed right between the preexisting seams so the stitches would not show. The inside did have some of the seams go astray but no one is going to really see it. If I was going to make a better corset in the future I would hand stitch this part so there was no stray threads on the inside.
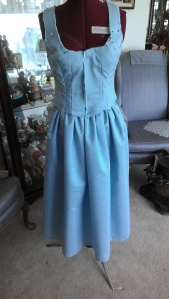
Here it is on the dress form. I super proud of the darts because they actually worked really well!
So I took a break from the corset and decided to do the skirt next. I basically just cut about a 3 yards long piece by 35 inch wide piece of fabric. I hemmed the one side and serged the rest of it. I gathered the fabric by hand and attached it to the waist band. The waist band is secured with a seven inch invisible zipper and a set of snaps on the band.
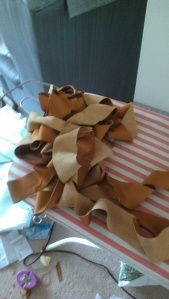
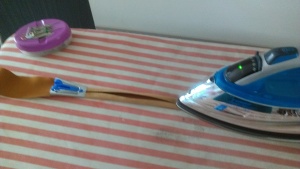
Next, I created a couple of yards of bias tape with my new bias tape maker! All you have to do is cut the fabric as directed on the box it came in. Push it through the bias tape maker and iron it flat. It took awhile but was pretty easy for the most part.
To finish up the top all I had to do was attach the bias tape and had the grommet holes. There are a ton of great tutorials on how to attach the bias tape that will explain it worlds better than I could. Here are some links for that:
http://sewtospeak.blogspot.com/2010/04/how-to-attach-bias-tape-with-mitered.html
http://www.merrimentdesign.com/how-to-sew-bias-tape-with-mitered-corners.php
After I followed those directions I had it pretty much all completed!
I did not take pictures of the blouse making process since I made it the night before the con. It was quite messy on the inside and I plan on remaking it with more historical approach to it. Hopefully I can complete that soon before my next con in September. I will be sure to post it in a more timely matter the next time. My next posts will be the long awaited silicone mermaid tail parts. I have no clue how I am going to go about writing it yet. It will be A LOT of parts since there is so much involved in making a tail. I might just post all of my progress photos and forgo the explanation part because I really do not want to tell anyone something wrong. I am currently working on Coronation Elsa and a Historical Elsa design so I will be posting my progress on those as well.
As always thanks for reading and have a great day! 😀
